本日の目標
できるだけ堅牢性の高いアプリの雛形を作りたい、ただし Story Board や Interface Builder を使わずに。
きっかけ
『iOS開発におけるパターンによるオートマティズム』のp.9には、以下のような導入文があります。
(前略)このときよく行われるのが、チュートリアルで作ったアプリをベースとして、そこから拡張していくやり方だ。この方法は、規模が小さいときはうまくいく。(中略)だが、遅かれ早かれ、この方法は破綻する。ある機能を実装したソースコードがあちこちに分散してしまっていたり、新しいクラスを追加しようとしても現在のクラス設計ではうまくいかなかったり、気がつくと原因不明のエラーが頻発してまともに動かなくなったりしてしまうだろう。
特に、Interface Builder や Story Board が自動化してくれる処理をすべて自分自身でコーディングする事を考えると、開発の初期段階である程度の柔軟性を保証できるようにクラスを分けておく事が必要です。
しかし、“変更への堅牢性”を備えたコーディングは初心者の直感に反する冗長な作業が多いため、明確に手順化しておく必要があると感じました。
そこで今回は、個人的に便利だと感じているデザインパターンをいくつか導入しつつ、最小限のアプリの“雛形”を作ってみようと思います。アプリそのものは画面の真ん中にボタンがあるだけの大変貧相なものですが、今回のテーマの本質ではないので手を抜きました。
大まかなクラス設計はだいたいこんな感じです。

ただし、図中の ConcreteViewController1 , ConcreteViewController2 はダミーです。今回は作りませんが、今後簡単に追加できます、という事を示すために敢えて描きました。
準備
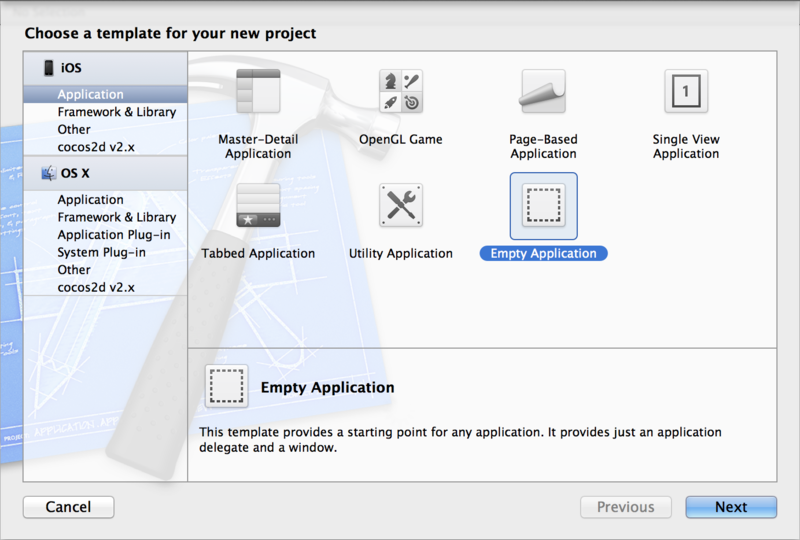
何はともあれプロジェクトを作ります。
私の好みで、Empty Application を選択しました。

メイン画面を作る
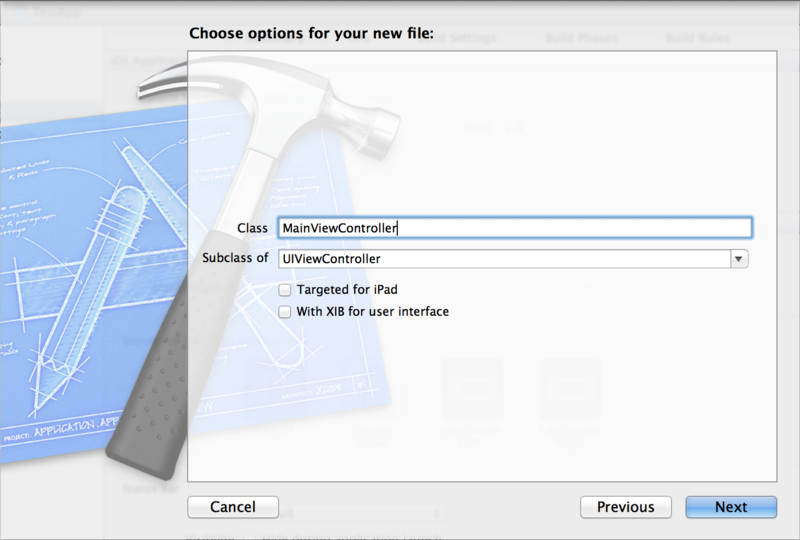
始めに、アプリを起動した際に最初に表示される画面を作ってみます。Xcode で Cmd + n を押し、以下の3つのファイルを新規作成します。
- MainViewController.h
- ViewControllers.h
- MainViewController.m
ただし、MainViewController の基本クラス (Subclass of) には UIViewController を指定します。

以下、各ファイルのコードです。
はじめに、MainViewController.h を確認します。これは Xcode によって自動生成されたコードそのままで、特に手を加える必要はありません。
MainViewController.h
#import <UIKit/UIKit.h>

@interface MainViewController : UIViewController

@end
ViewControllers.h には、アプリケーションで使用される全ての ViewController 派生クラスのヘッダファイルをまとめておく事にします。こうしておくと、複数の ViewController を持つアプリを作る際にコーディングの負担が減るのです。
ViewControllers.h
#import "MainViewController.h"

// ViewController が増えたら、ここに import を追加します。
// 例:
//     #import "ConcreteViewController1.h"
//     #import "ConcreteViewController2.h"
//                           :
次に、いよいよ実装部 MainViewController.m のコーディングを行います。import しているヘッダが、先ほどの ViewControllers.h である点に注意しましょう。インタフェースである MainViewController.h には間接的に依存する形になります。
MainViewController.m
// importするヘッダに注意!
#import "ViewControllers.h"

@interface MainViewController ()

@end

@implementation MainViewController
{
    // ボタンを作ります
    UIButton *button;
}

- (id)initWithNibName:(NSString *)nibNameOrNil bundle:(NSBundle *)nibBundleOrNil
{
    self = [super initWithNibName:nibNameOrNil bundle:nibBundleOrNil];
    if (self) {

        // ボタンを初期化します
        button = [UIButton buttonWithType:UIButtonTypeRoundedRect];
    }
    return self;
}

- (void)viewDidLoad
{
    [super viewDidLoad];

    // ボタンのキャプションを設定
    [button setTitle:@"こんにちはボタン" forState:UIControlStateNormal];

    // キャプションに合わせてサイズを自動調整
    [button sizeToFit];

    // ボタンを画面中心に移動
    button.center = self.view.center;

    // 画面変更時にボタンの位置を自動調整
    button.autoresizingMask = UIViewAutoresizingFlexibleWidth |
        UIViewAutoresizingFlexibleHeight |
        UIViewAutoresizingFlexibleLeftMargin |
        UIViewAutoresizingFlexibleRightMargin |
        UIViewAutoresizingFlexibleTopMargin |
        UIViewAutoresizingFlexibleBottomMargin;

    // ボタン押下時のイベントを登録
    [button addTarget:self action:@selector(buttonDidPush)
        forControlEvents: UIControlEventTouchUpInside];

    // ボタンを画面に追加
    [self.view addSubview:button];
}

// ボタン押下時のイベント
- (void)buttonDidPush
{
    NSLog(@"ボタンが押されました");
}

- (void)didReceiveMemoryWarning
{
    [super didReceiveMemoryWarning];
}
@end
ここまでで、画面そのものはできました。しかし、このままエミュレータを起動しても画面には何も表示されません。アプリ起動時に画面を表示するための処理を書き加えねばならないのです。
ViewControllerをアプリに紐づける
まず、MainViewController を生成して返すファクトリを作ります。これも、複数の ViewController を持つアプリを作る際に、初期画面となる ViewController の生成コードを ApplicationDelegate クラスにハードコーディングせずに済むという利点があります。
MainViewControllerFactory.h
#import <UIKit/UIKit.h>

@interface MainViewControllerFactory : NSObject

+ (UIViewController *) createMainViewController;

@end
MainViewControllerFactory.m
#import "MainViewControllerFactory.h"
#import "ViewControllers.h"

@implementation MainViewControllerFactory

+ (UIViewController*) createMainViewController
{
    // メインとなる ViewController のインスタンスを生成して返す
    return [[MainViewController alloc] init];
}

@end
最後の仕上げに、アプリケーション起動時に先ほどのファクトリから得たインスタンスオブジェクトをウィンドウに追加する処理を書きます。
AppDelegate.h
#import <UIKit/UIKit.h>

@interface AppDelegate : UIResponder <UIApplicationDelegate>

@property (strong, nonatomic) UIWindow *window;

@end
AppDelegate.m
#import "AppDelegate.h"
#import "MainViewControllerFactory.h"

@implementation AppDelegate {
    UIViewController *viewController;
}

- (BOOL)application:(UIApplication *)application didFinishLaunchingWithOptions:(NSDictionary *)launchOptions
{
    self.window = [[UIWindow alloc] initWithFrame:[[UIScreen mainScreen] bounds]];
    self.window.backgroundColor = [UIColor whiteColor];

    // Factory Methodを用いてメイン画面を生成し、ウィンドウに登録
    viewController = [MainViewControllerFactory createMainViewController];
    [self.window setRootViewController:viewController];

    [self.window makeKeyAndVisible];
    return YES;
}
以上で、最低限の雛形ができました。
次回は、この雛形を使ってアプリケーションを拡張してみようと思います。